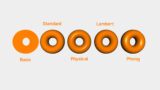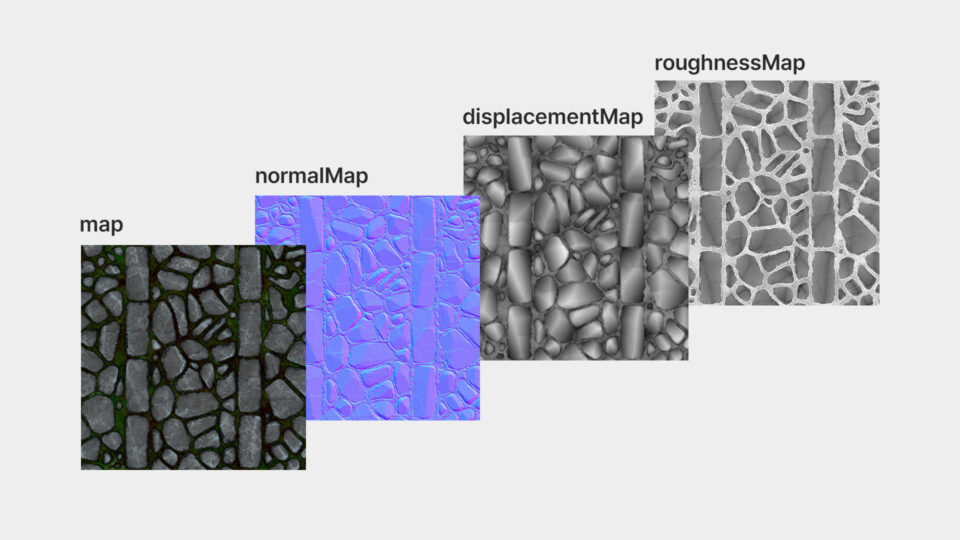
안녕하세요. 저번시간에는 머티리얼에 대해 배워봤죠. 이번에는 그 머티리얼에 추가로 텍스처를 넣는 방법을 배워볼게요. 질감을 배워보면 3D 물체에 훨씬더 현실성있게 표현이 가능하고 완성도를 높일 수 있습니다. TextureLoader를 이용해서 저번시간에 배워본 메시 스텐다드 머티리얼에 텍스처를 넣는 방법과 추가된 텍스처에 대한 프로퍼티 map, nomalMap, displacementMap, roughnessMap에 대해 배워볼게요.
질감 다운받기 : https://3dtextures.me/2022/01/16/stone-path-008/
*디자인 베이스 강좌는 Mac OS를 기준으로 해서 윈도우 사용자와 일부 차이가 있을 수 있습니다. 윈도우 사용자분들은 영상에서 커맨드(Cmd)라는 단축키 대신 컨트롤(Ctrl)을, 옵션(Option) 대신 알트(Alt)를 눌러주세요.