Android Layout 완벽 이해
안녕하세요. 이번에는 안드로이드에서 일반적으로 사용되는 레이아웃에 대해 배워보도록 할게요. 그리고 실제 안드로이드에서 개발자들이 화면 레이아웃을 잡을때 어떤 형식으로 개발하는지 살펴보면서 디자이너 입장에서 어떤식으로 동작하는지 알아보는 시간을 가질게요.
레이아웃 영역
머티리얼 디자인은 플랫폼, 환경 및 화면 크기 전반에 걸쳐 일관성을 유지하려고 노력합니다. Android에서는 크게 3가지 영역으로 구분합니다:
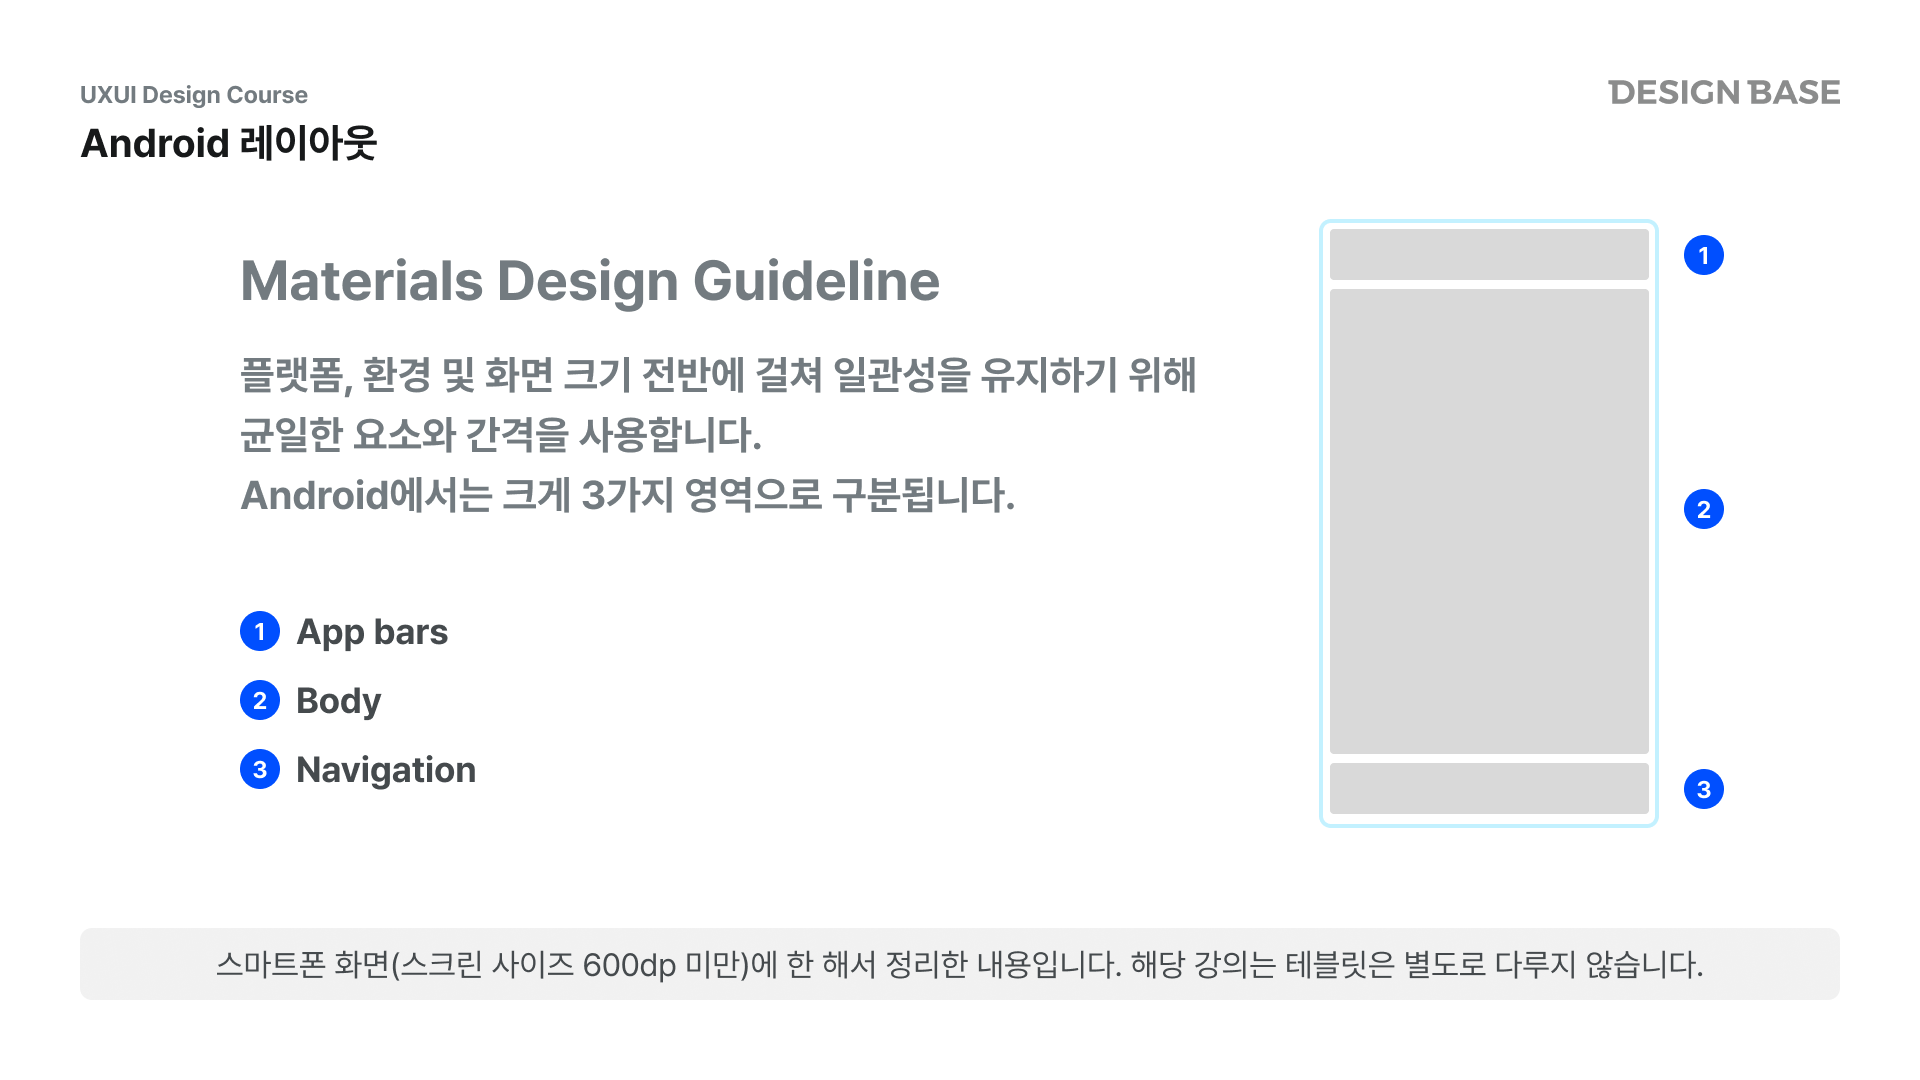
- App bars: 애플리케이션의 주요 기능을 제공하는 영역입니다.
- Body: 주 내용이 위치하는 영역입니다.
- Navigation: 사용자가 다른 화면이나 기능으로 이동할 수 있는 영역입니다.
페이지 구성
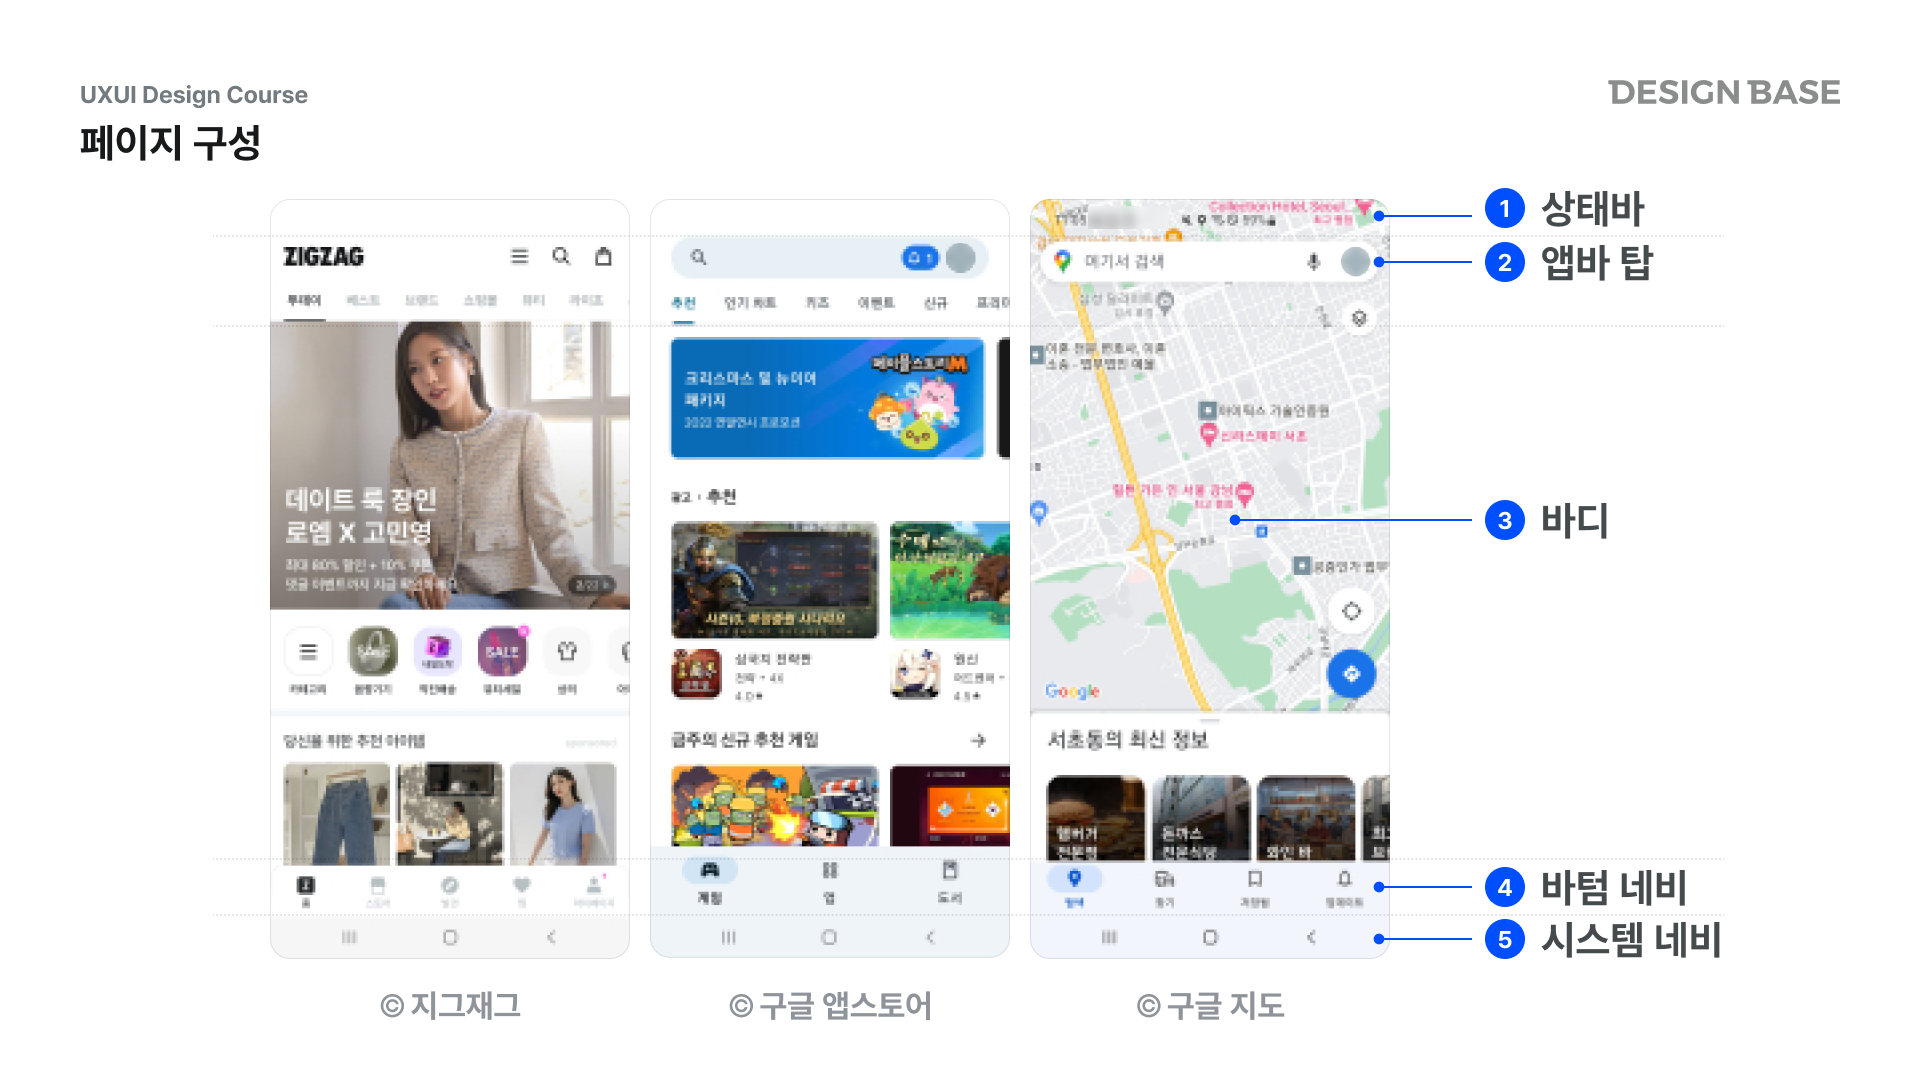
좀 더 디테일하게 보면, 아래와 같은 세분화된 구성 요소를 볼 수 있습니다:
- 상태바
- 앱바탑
- 바디
- 바텀네비
- 시스템 네비
측정 방식
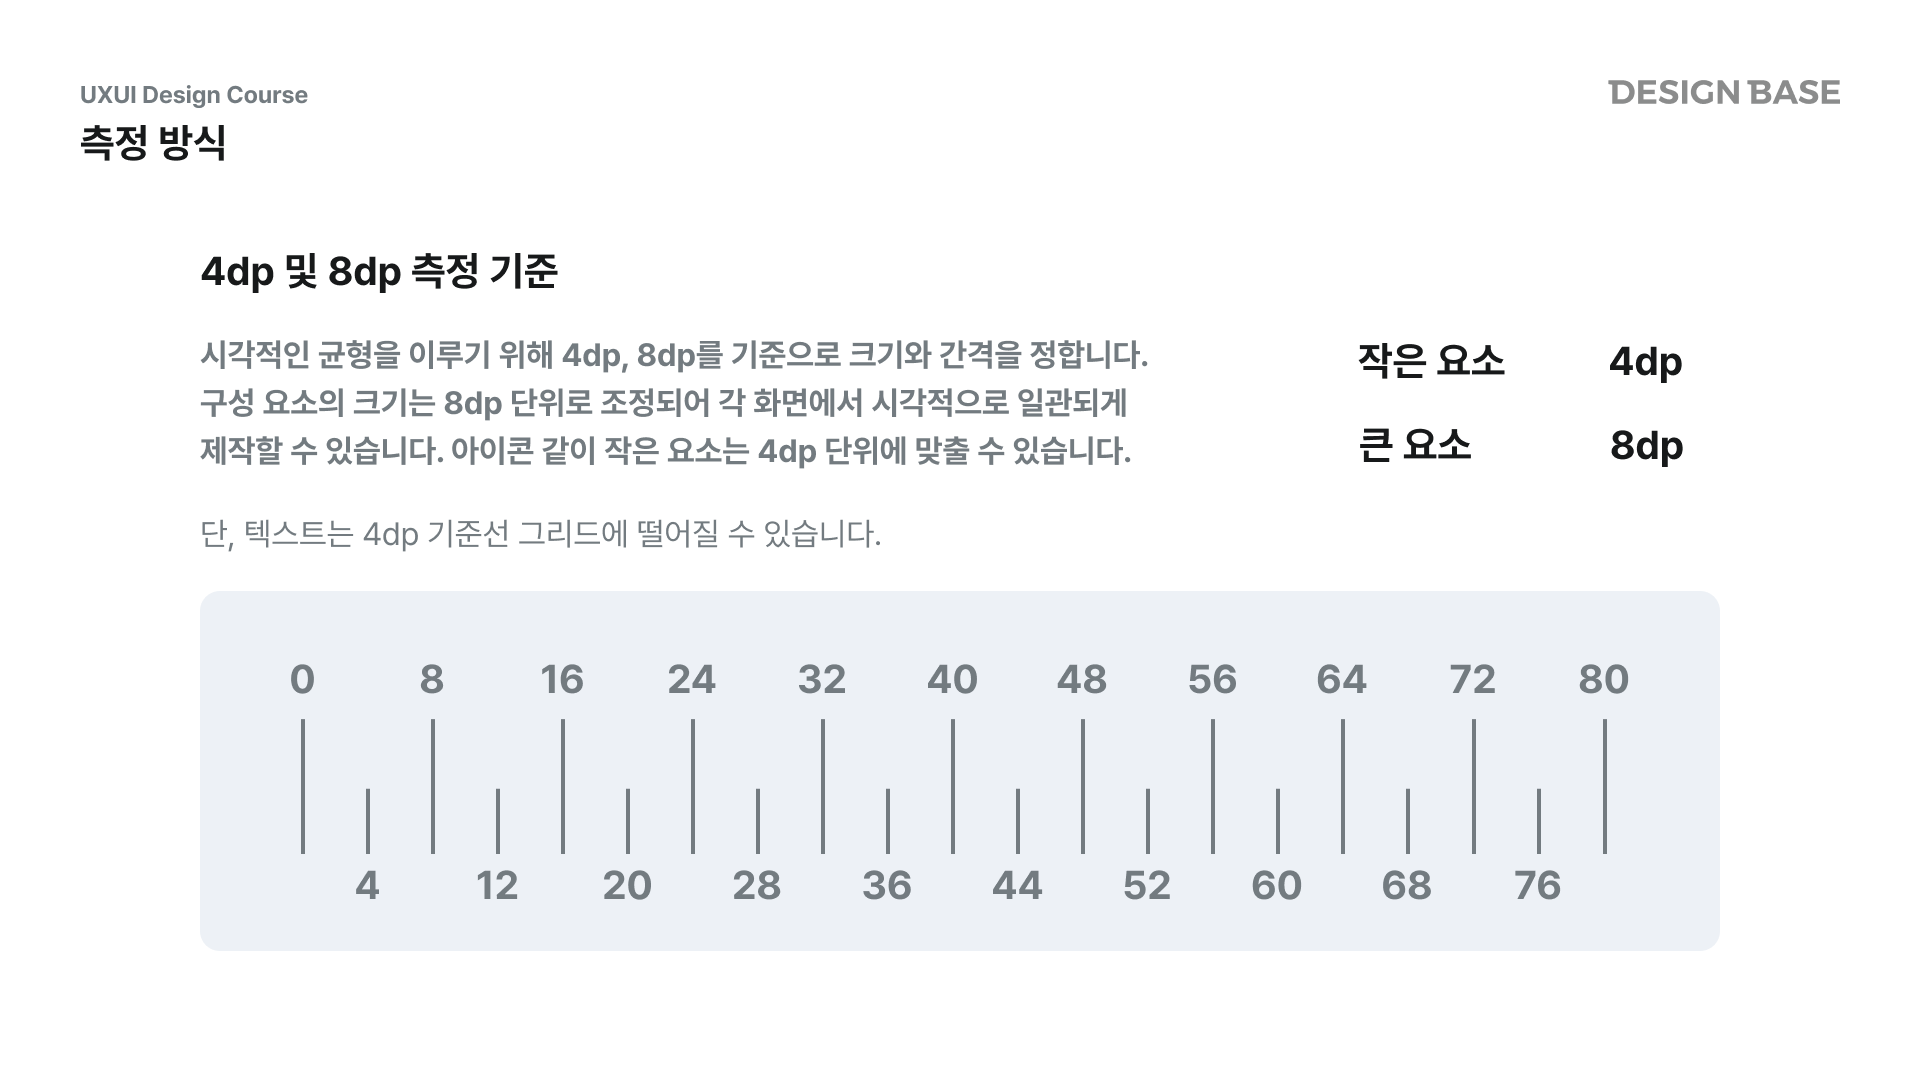
머티리얼 디자인은 시각적 균형을 중요하게 생각합니다. 이를 위해 8dp 단위로 구성 요소의 크기를 조정하여 화면에서의 일관성을 유지합니다. 아이콘과 같은 작은 요소는 4dp 그리드에, 타이포그래피는 4dp 기준선 그리드에 위치할 수 있습니다.
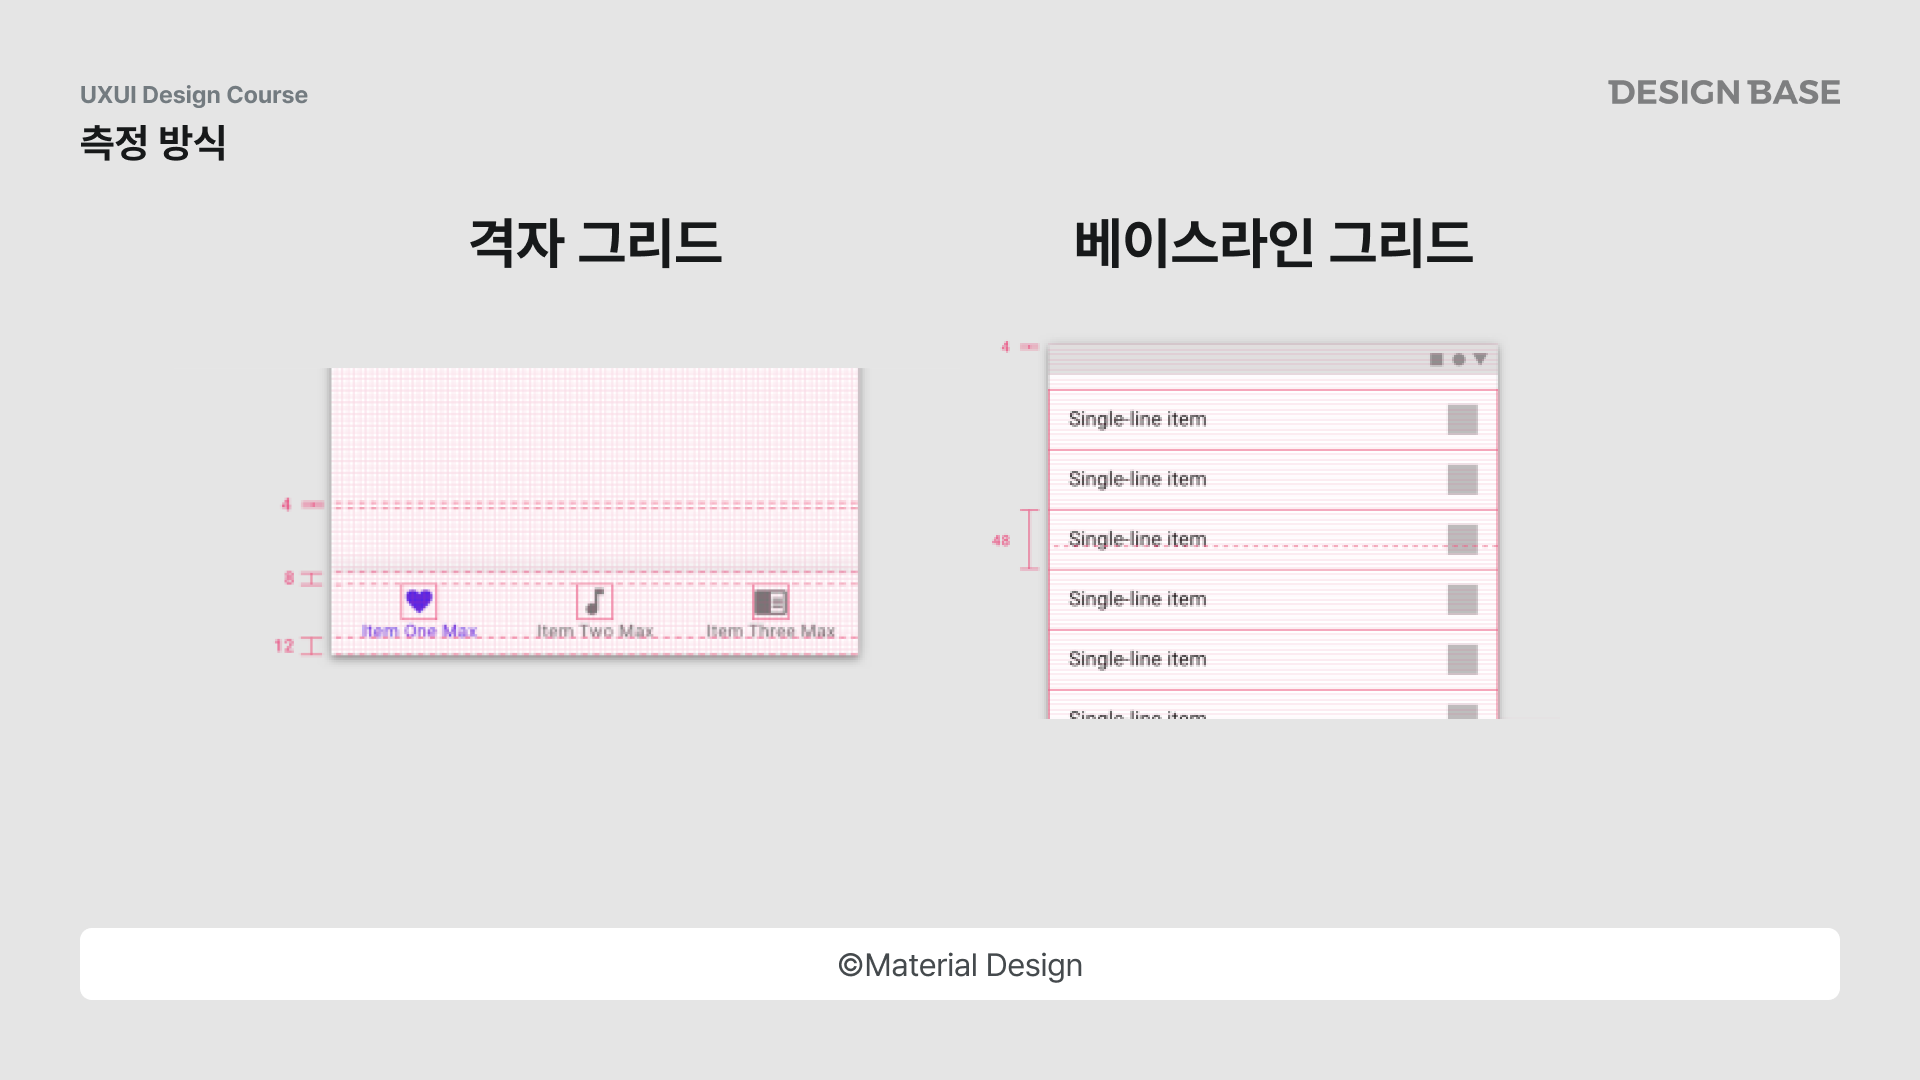
격자 그리드
디자인 시 격자 그리드를 활용하면 레이아웃을 더 깔끔하게 구성할 수 있습니다.
베이스라인 그리드
베이스라인 그리드는 텍스트와 다른 요소들의 위치를 조정하여 레이아웃의 일관성을 유지하는데 도움을 줍니다.
안드로이드 스튜디오에서 레이아웃 구현
안드로이드 스튜디오에서는 여러 가지 레이아웃을 사용해 UI를 구성할 수 있습니다. 여기서는 Linear Layout과 Constraints Layout에 대해 살펴보겠습니다.
Linear Layout
Linear Layout은 뷰를 수평 또는 수직으로 배치하는 데 사용됩니다. 장점으로는 빠른 구성이 가능하지만, 중첩 레이아웃을 만들 경우 성능 저하의 위험이 있습니다.
<LinearLayout xmlns:android="http://schemas.android.com/apk/res/android"
    xmlns:app="http://schemas.android.com/apk/res-auto"
    xmlns:tools="http://schemas.android.com/tools"
    android:layout_width="match_parent"
    android:layout_height="match_parent"
    android:padding="16dp"
    android:orientation="vertical"
    tools:context=".MainActivity">

    <TextView
        android:layout_width="wrap_content"
        android:layout_height="wrap_content"
        android:text="안녕하세요."
        android:layout_margin="8dp"
        android:textSize="20sp"
        android:background="#eeeeee"
        android:layout_weight="1"
        />
    <TextView
        android:layout_width="wrap_content"
        android:layout_height="wrap_content"
        android:text="안녕하세요."
        android:layout_margin="8dp"
        android:textSize="20sp"
        android:background="#eeeeee"
        />
    <TextView
        android:layout_width="wrap_content"
        android:layout_height="wrap_content"
        android:text="안녕하세요."
        android:layout_margin="8dp"
        android:textSize="20sp"
        android:background="#eeeeee"
        />
</LinearLayout>
Constraint Layout
Constraint Layout은 뷰의 상대적 위치를 지정하여 구성하는 레이아웃입니다. 이를 사용하면 다양한 크기의 디바이스에서 일관된 모양을 유지할 수 있습니다.
<androidx.constraintlayout.widget.ConstraintLayout xmlns:android="http://schemas.android.com/apk/res/android"
    xmlns:app="http://schemas.android.com/apk/res-auto"
    xmlns:tools="http://schemas.android.com/tools"
    android:layout_width="match_parent"
    android:layout_height="match_parent"
    android:padding="16dp"
    tools:context=".MainActivity">

    <TextView
        android:layout_width="wrap_content"
        android:layout_height="wrap_content"
        android:layout_margin="8dp"
        android:layout_marginTop="32dp"
        android:background="#eeeeee"
        android:text="안녕하세요."
        android:textSize="20sp"
        app:layout_constraintEnd_toEndOf="parent"
        app:layout_constraintStart_toStartOf="parent"
        app:layout_constraintTop_toTopOf="parent" />

    <TextView
        android:layout_width="wrap_content"
        android:layout_height="wrap_content"
        android:layout_margin="8dp"
        android:layout_marginEnd="16dp"
        android:layout_marginBottom="16dp"
        android:background="#eeeeee"
        android:text="안녕하세요."
        android:textSize="20sp"
        app:layout_constraintBottom_toBottomOf="parent"
        app:layout_constraintEnd_toEndOf="parent" />

    <TextView
        android:id="@+id/textView"
        android:layout_width="wrap_content"
        android:layout_height="wrap_content"
        android:layout_margin="8dp"
        android:background="#eeeeee"
        android:text="안녕하세요."
        android:textSize="20sp"
        app:layout_constraintBottom_toBottomOf="parent"
        app:layout_constraintEnd_toEndOf="parent"
        app:layout_constraintStart_toStartOf="parent"
        app:layout_constraintTop_toTopOf="parent" />

</androidx.constraintlayout.widget.ConstraintLayout>
피그마의 Constraints 기능과 유사하게 이해하시면 됩니다. 이외에도 여러 레이아웃 방식이 있지만, 디자이너가 알 필요는 없다고 생각되어 여기서는 넘어가겠습니다. 디자인과 개발의 연계를 이해하면, 더 효과적인 작업이 가능해집니다. 오늘의 내용이 도움이 되셨기를 바랍니다!
질문과 답변 기능을 이용하려면 로그인해야 합니다.
로그인 후 이 콘텐츠를 이용할 수 있습니다.
등록된 공지사항이 없습니다.
강좌 공지가 등록되면 이곳에서 확인할 수 있습니다.